- Database
- Quests
- By Location
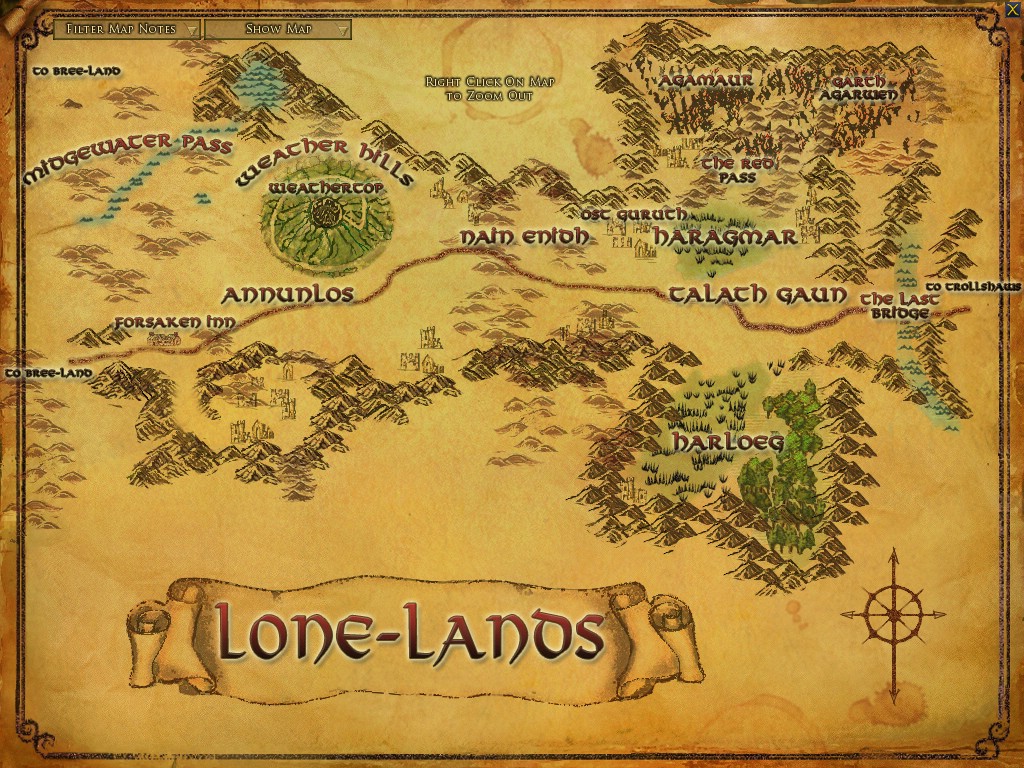
- Lone-Lands
- The Forsaken Inn
- Inn of the Forsaken: Riddles in the Dark (Tier2)
Inn of the Forsaken: Riddles in the Dark (Tier2)
Series Name: Lone-lands
Leads To: Challenge: The Perfect Fellowship
Leads To: End the Wailing at the Source
Start Zone: Lone-Lands
Start Area: The Forsaken Inn
Start Mob: Ctrl+J
Flags: Repeatable, Skirmish, Small Fellowship
Items Rewarded:
- Always Receive:
Max Level: 65
Send a correction
Click here for more and bigger maps with filtering options
| Anlaf the Forlorn | |
| Arinora | |
| Kobbi Stonestar | |
| Sorel Dorson | |
| The Forsaken Inn |
Bestowal
Inn of the Forsaken
"You have been asked by the proprietor of the Forsaken Inn to investigate the source of a terrible wailing noise coming from the basement. Rumours abound that the inn is haunted and as a result, business has been suffering."
Background
You find yourself inside The Forsaken Inn at midnight. The innkeeper has asked that you investigate the source of the wailing noises coming from the basement.
Objectives
Objective 1
Patrons have already begun complaining of the noises in the basement. Explore the area and see if you can uncover the source of the noises.
Objective 2
The bookshelf was hiding a secret passage leading down into the earth below the Inn. You should explore this cavern and see if you can locate who or what is making those noises.
Objective 3
You have found a suspicious-looking man reading a book and staring at the glowing, rune-marked door in front of him. Who is this man, and why is he down here? You had best ask him.
Objective 4
Umin, the man you met in these caverns, has agreed to assist you in your exploration of this place. You must use his expertise to make your way deeper into the caverns.
Objective 5
You have discovered what appears to be a burial chamber. Perhaps Umín could shed some light on this place.
Objective 6
Umín has been crushed by the cave-in. You must press on without him. You are on your own now, so be always on guard.
Objective 7
It is Umin. Alive and well, it seems...too well even. It appears that he has gained an almost supernatural strength in his absence. He wears a red, glowing necklace around his neck. He is also a bit angry with you...you will have to defeat him if you want to survive.
Objective 8
or
The spinning blade-trap has knocked the necklace from Umín's neck, and it lies glowing on the floor. Umin himself lies crumpled on the floor. Why did he attack you?
Speak with him and allow him to explain....
Objective 9
It wasn't Umin at all that was trying to kill you. It was the spirt inhabiting the necklace. It was controlling him, making him do its bidding. You must destroy the spirit, lest it escapes from the place and wreaks havoc upon Middle-earth.
Objective 10
It is over. The spirit has been defeated. Speak with Umin and explain your victory.
Notes
Runed Doors & Riddle Inscriptions
To open the doors with the riddles, you use Emotes, the chat bar has all the emotes you would need to do this, so use it. The Runed Doors, with there Riddle Inscriptions will be different every time, there are 83 different inscriptions.
Riddle Inscription 01: /faint
Riddle Inscription 02: /story
Riddle Inscription 03: /no
Riddle Inscription 04: /mumble
Riddle Inscription 05: /look
Riddle Inscription 06: /smoke
Riddle Inscription 07: /dance
Riddle Inscription 08: /rude
Riddle Inscription 09: /cower
Riddle Inscription 10: /pat
Riddle Inscription 11: /shrug
Riddle Inscription 12: /surrender
Riddle Inscription 13: /mock
Riddle Inscription 14: /kneel
Riddle Inscription 15: /sad
Riddle Inscription 16: /angry
Riddle Inscription 17: /stare
Riddle Inscription 18: /cry
Riddle Inscription 19: /sorry
Riddle Inscription 20: /impatient
Riddle Inscription 21: /bye
Riddle Inscription 22: /handstand
Riddle Inscription 23: /thank
Riddle Inscription 24: /whistle
Riddle Inscription 25: /blush
Riddle Inscription 26: /flirt
Riddle Inscription 27: /nothing
Riddle Inscription 28: /away
Riddle Inscription 29: /beg
Riddle Inscription 30: /fight
Riddle Inscription 31: /hug
Riddle Inscription 32: /sing
Riddle Inscription 33: /mourn
Riddle Inscription 34: /assist
Riddle Inscription 35: /crazy
Riddle Inscription 36: /liedown
Riddle Inscription 37: /laugh
Riddle Inscription 38: /bored
Riddle Inscription 39: /sit
Riddle Inscription 40: /mood_sleepy
Riddle Inscription 41: /eat
Riddle Inscription 42: /stretch
Riddle Inscription 43: /bow
Riddle Inscription 44: /wave
Riddle Inscription 45: /shiver
Riddle Inscription 46: /sigh
Riddle Inscription 47: /clap
Riddle Inscription 48: /pose
Riddle Inscription 49: /poke
Riddle Inscription 50: /drool
Riddle Inscription 51: /ready
Riddle Inscription 52: /calm
Riddle Inscription 53: /agree
Riddle Inscription 54: /salute
Riddle Inscription 55: /cheer
Riddle Inscription 56: /pick
Riddle Inscription 57: /charge
Riddle Inscription 58: /slap
Riddle Inscription 59: /sweat
Riddle Inscription 60: /drink
Riddle Inscription 61: /wink
Riddle Inscription 62: /roar
Riddle Inscription 63: /scratch
Riddle Inscription 64: /tear
Riddle Inscription 65: /scold
Riddle Inscription 66: /yawn
Riddle Inscription 67: /talk
Riddle Inscription 68: /challenge
Riddle Inscription 69: /bother
Riddle Inscription 70: /pushups
Riddle Inscription 71: /curtsey
Riddle Inscription 72: /cough
Riddle Inscription 73: /point
Riddle Inscription 74: /flip
Riddle Inscription 75: /wait
Riddle Inscription 76: /beckon
Riddle Inscription 77: /yes
Riddle Inscription 78: /grumble
Riddle Inscription 79: /kiss
Riddle Inscription 80: /think
Riddle Inscription 81: /hail
Riddle Inscription 82: /innocent
Riddle Inscription 83: /shakefist
The answers for these riddles were given by Markbjorn at http://forums.lotro.com/showthread.php?392884-IOF-Answers-to-Riddles
The Ancient Letter, Sarcophagus, & Lever
For this part, use the letter, it will tell you three names, then click on the Strange Runes, and the runes that match those names, click on its Sarcophagus, then kill the Pile of Bones inside, and click on the Lever, do this until you get all three names.
How to defeat Umin
Part 1:
One player becomes the "Tank", to keep Umin over the spike traps (note: do not stand on the spike traps, they will damage and kill the players when set off), the tank should keep themselves, up against the south end of the ship, just behind the spike trap there, with their back against the wall therefore avoiding knockbacks and also placing Umin on the spike trap, the second player your "Healer", a Minstrel/Rune-keeper/Lore-master, will begin to chain heal your tank for the entire battle with Umin, the third player the "Trap-trigger" attacks Umin but never gets or keeps agro. At some point Umin will hit half morale, then you start the Part 2.
Part 2:
At this point, Umin's attacks have opened both the south and north ends of the ship, Umin uses the necklace, and becomes immune to all attacks, however there is a way to bypass this shield effect. When Umin strikes at the tank to smash him, he will get his hands stuck into the ship, at this point the trap-trigger will run the south end, on the overhead of where the tank is fighting Umin and step-on the pressure plate, this will set off the spike traps and remove Umin's shield from the necklace, now the tank and trap-trigger attack Umin for as much damage as possible before his shield comes back up. Once the shield is back up wait for Umin to get his hands stuck again, and repeat the spike trap on him.
Part 3:
Eventually Umin will hit less then 100 morale, he will then run to the middle of the ship, to heal himself, do not let him, use ranged attacks and keep hitting him (note: Umin if left alone, he will heal himself back to 1/4 of his morale, when he runs to the center of the ship, if this happens it will set you back to Part 2) but do not chase him to the center, the trap-trigger should now head to the north end of the ship, and step-on the pressure plate there, it will set off the blades trap, and then Umin's fight is over, he is defeated, he returns to normal, and he will now speak with you.
SIDE NOTE:
If you have completed the quest Inn of the Forsaken: Stroke of Midnight and this instance, you will have to wait until it is Dark In Game, to repeat it, it will not appear in your Skirmishes Panel until it is night time in game.