


Escape to Erebor
We go on a tour from Dale to the Lonely Mountain in the tenth update for Lord of the Rings Online.
There are many glorious battles throughout the Lord of the Rings. In the closing chapters of Tolkien’s epic saga, the monumental struggles at Minas Tirith and the Black Gate of Morannon marked a shift in the tide against Sauron’s dark shadow.
But as that Third Age drew to a close, similar conflicts were unfolding across Middle Earth. It’s these skirmishes and sieges that are the focus of the tenth update for Lord of the Rings Online. Concluding the Riders of Rohan instance pack, Turbine takes us on a journey from Dale to the Lonely Mountain.
Guiding me through the new raids being planned for Update 10, producer Hannah Foell explained that the development team had stumbled on a curiosity; the Easterlings never came down to Rohan as they were tied up fighting in Dale and Erebor. This latest content pack tells the story of what happened during the attack and escape from Dale, and the later siege of the Lonely Mountain by the Easterlings.
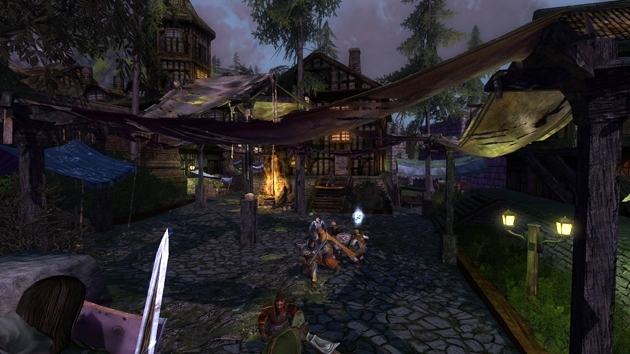
The saga begins with The Bells of Dale, a six player instance set during the early stages of the Easterling attack. By now any hope to repel the invasion is futile, yet the townspeople still need to be evacuated. With a mix of street fighting and tight boss battles, our group began the race to ring each of the bells and alert the citizens to leave for the safety of Erebor.
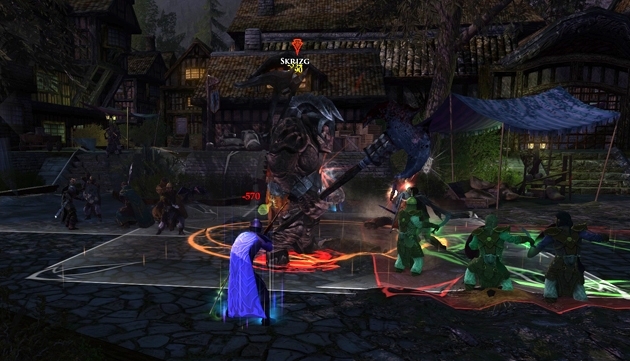
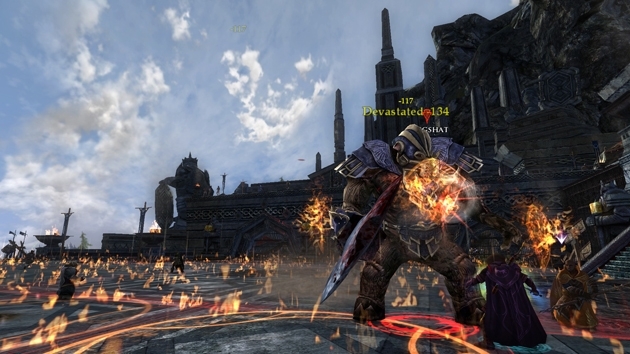
It was against one of the Easterling champions, a troll named Skrizg, that Foell pointed out the new hotspot marker that’s been added in to indicate AoE zones. In order to make it easier to communicate the area of a hotspot – be it beneficial or hazardous – white or red squares will now appear on the ground. With Skrizg summoning additional Easterlings every ten seconds, and getting a damage bonus from each wave still standing, visual communication cues like this are essential.
As the Battle of Dale came to an end, King Brand and Dain Ironfoot, leader of the Lonely Mountain Dwarves, fought and died trying to hold off the Easterling attack. It’s at this moment that the adventure continues, with the Road to the Lonely Mountain being a 12-player raid. Foell explained that this raid is bossless, with players instead having to hold the small forest clearing for ten minutes in order to give the men of Dale time to escape.
During the course of the fight, there emerged from the trees seven waves of Easterlings, which can overwhelm a group if it takes too long to dispatch them. Slay them too quickly though, and the onslaught speeds up, removing your chances to recover. As an added test of skill, Foell mentioned that the challenge mode requires the death of 100 Easterlings before the timer is up. New on-screen meters have also been introduced to track your progress against both the instance timer and the challenge.
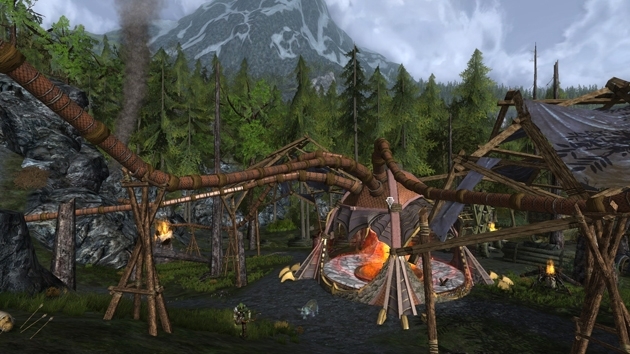
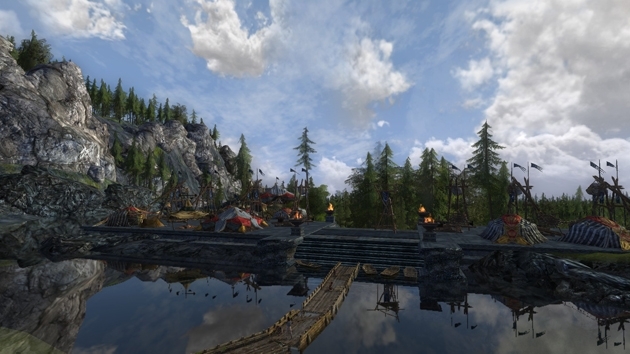
With both Men and Dwarves leaderless inside the Lonely Mountain, the Easterlings took to chemical warfare, releasing toxic smoke into the caves. The Fires of Smaug is the second raid in the series, taking place in an encampment on Raven Hill. The Easterlings have constructed a furnace that resembles Smaug, with four dragon heads on long pipes pumping fumes into the mountain.
The center of the furnace is fuelled by a Fire Grim, which players must carefully eliminate. It’s a gradual process, as valves on each of the four pipes need to be carefully controlled so that smoke doesn’t billow forth. And if that wasn’t enough, the Grim becomes immune to damage after each quarter of health lost, with Tenderlings rushing out to restore him.
After holding back the Easterling siege for about a month, word finally reached both camps that the One Ring had been destroyed. With dwindling numbers and supplies, the besieging army lies on the edge of defeat. The Battle of Erebor marks that end, with a raid of heroes sent to do battle against two Easterling Olog-Hai champions.
This isn’t just a battle though; it’s also an opportunity to embarrass and humiliate them. I was able to choose the terms of the battle by selecting from six different battle banners, with the difficulty (and reward) ramping up as more were activated. Options would affect one of the three phases of the fight, such as a phase one modifier where the Olog-Hai would get a 25% damage boost for each 1% health difference between them, or an inferno in phase 3 that would light the ground on fire and deal 5% damage to players every three seconds.
As Foell explained, the banners provide an opportunity to “pick your poison” by tweaking the encounter style to suit a group’s strengths and weaknesses, rather than having choices inflicted upon you by randomness or fate. It also makes it possible to learn each viable combination and gradually work toward that Challenge Mode where all six banners are triggered. The rewards for completing them are great – both higher drop rates of certain items and special Challenge Mode chests await.
Victorious, I stood on the edge of the arena, with both men and dwarves cheering at our triumph. As I looked out over the Running River, I could see the Easterling camp lying in tatters – it looked like the invaders had been camped there for months. I commented about these touches to Foell, who explained it’s all part of making the setting feel right. “It’s the little things that really make the world come to life.”
As the instances themselves tell a story, they do need to be completed in order on the easiest mode once. After that, players are free to tackle any they prefer at any challenge level. Rewards are also more tailored, with everyone receiving class-specific loot.
All the instances contained in Update 10 will be available to everyone who has purchased the Riders of Rohan expansion. With mounted combat, a continued adventure and a raised level cap of 85, the expansion is available in a range of digital downloads starting at $39.99.
Gareth “Gazimoff” Harmer, Senior Contributing Editor